Account Lockout
The Account Lockout feature provides security controls to automatically lock user accounts after multiple failed login attempts. This feature helps protect against brute-force attacks and unauthorized access attempts.
Account Lockout is a security mechanism that:
- Tracks failed login attempts
- Automatically locks accounts after exceeding configured thresholds
- Temporarily prevents access to locked accounts
- Helps protect against brute-force password attacks
Account lockout applies to internal users only. External users (LDAP/SSO) are managed by their respective authentication systems.
For external user management, see Authentication Options.
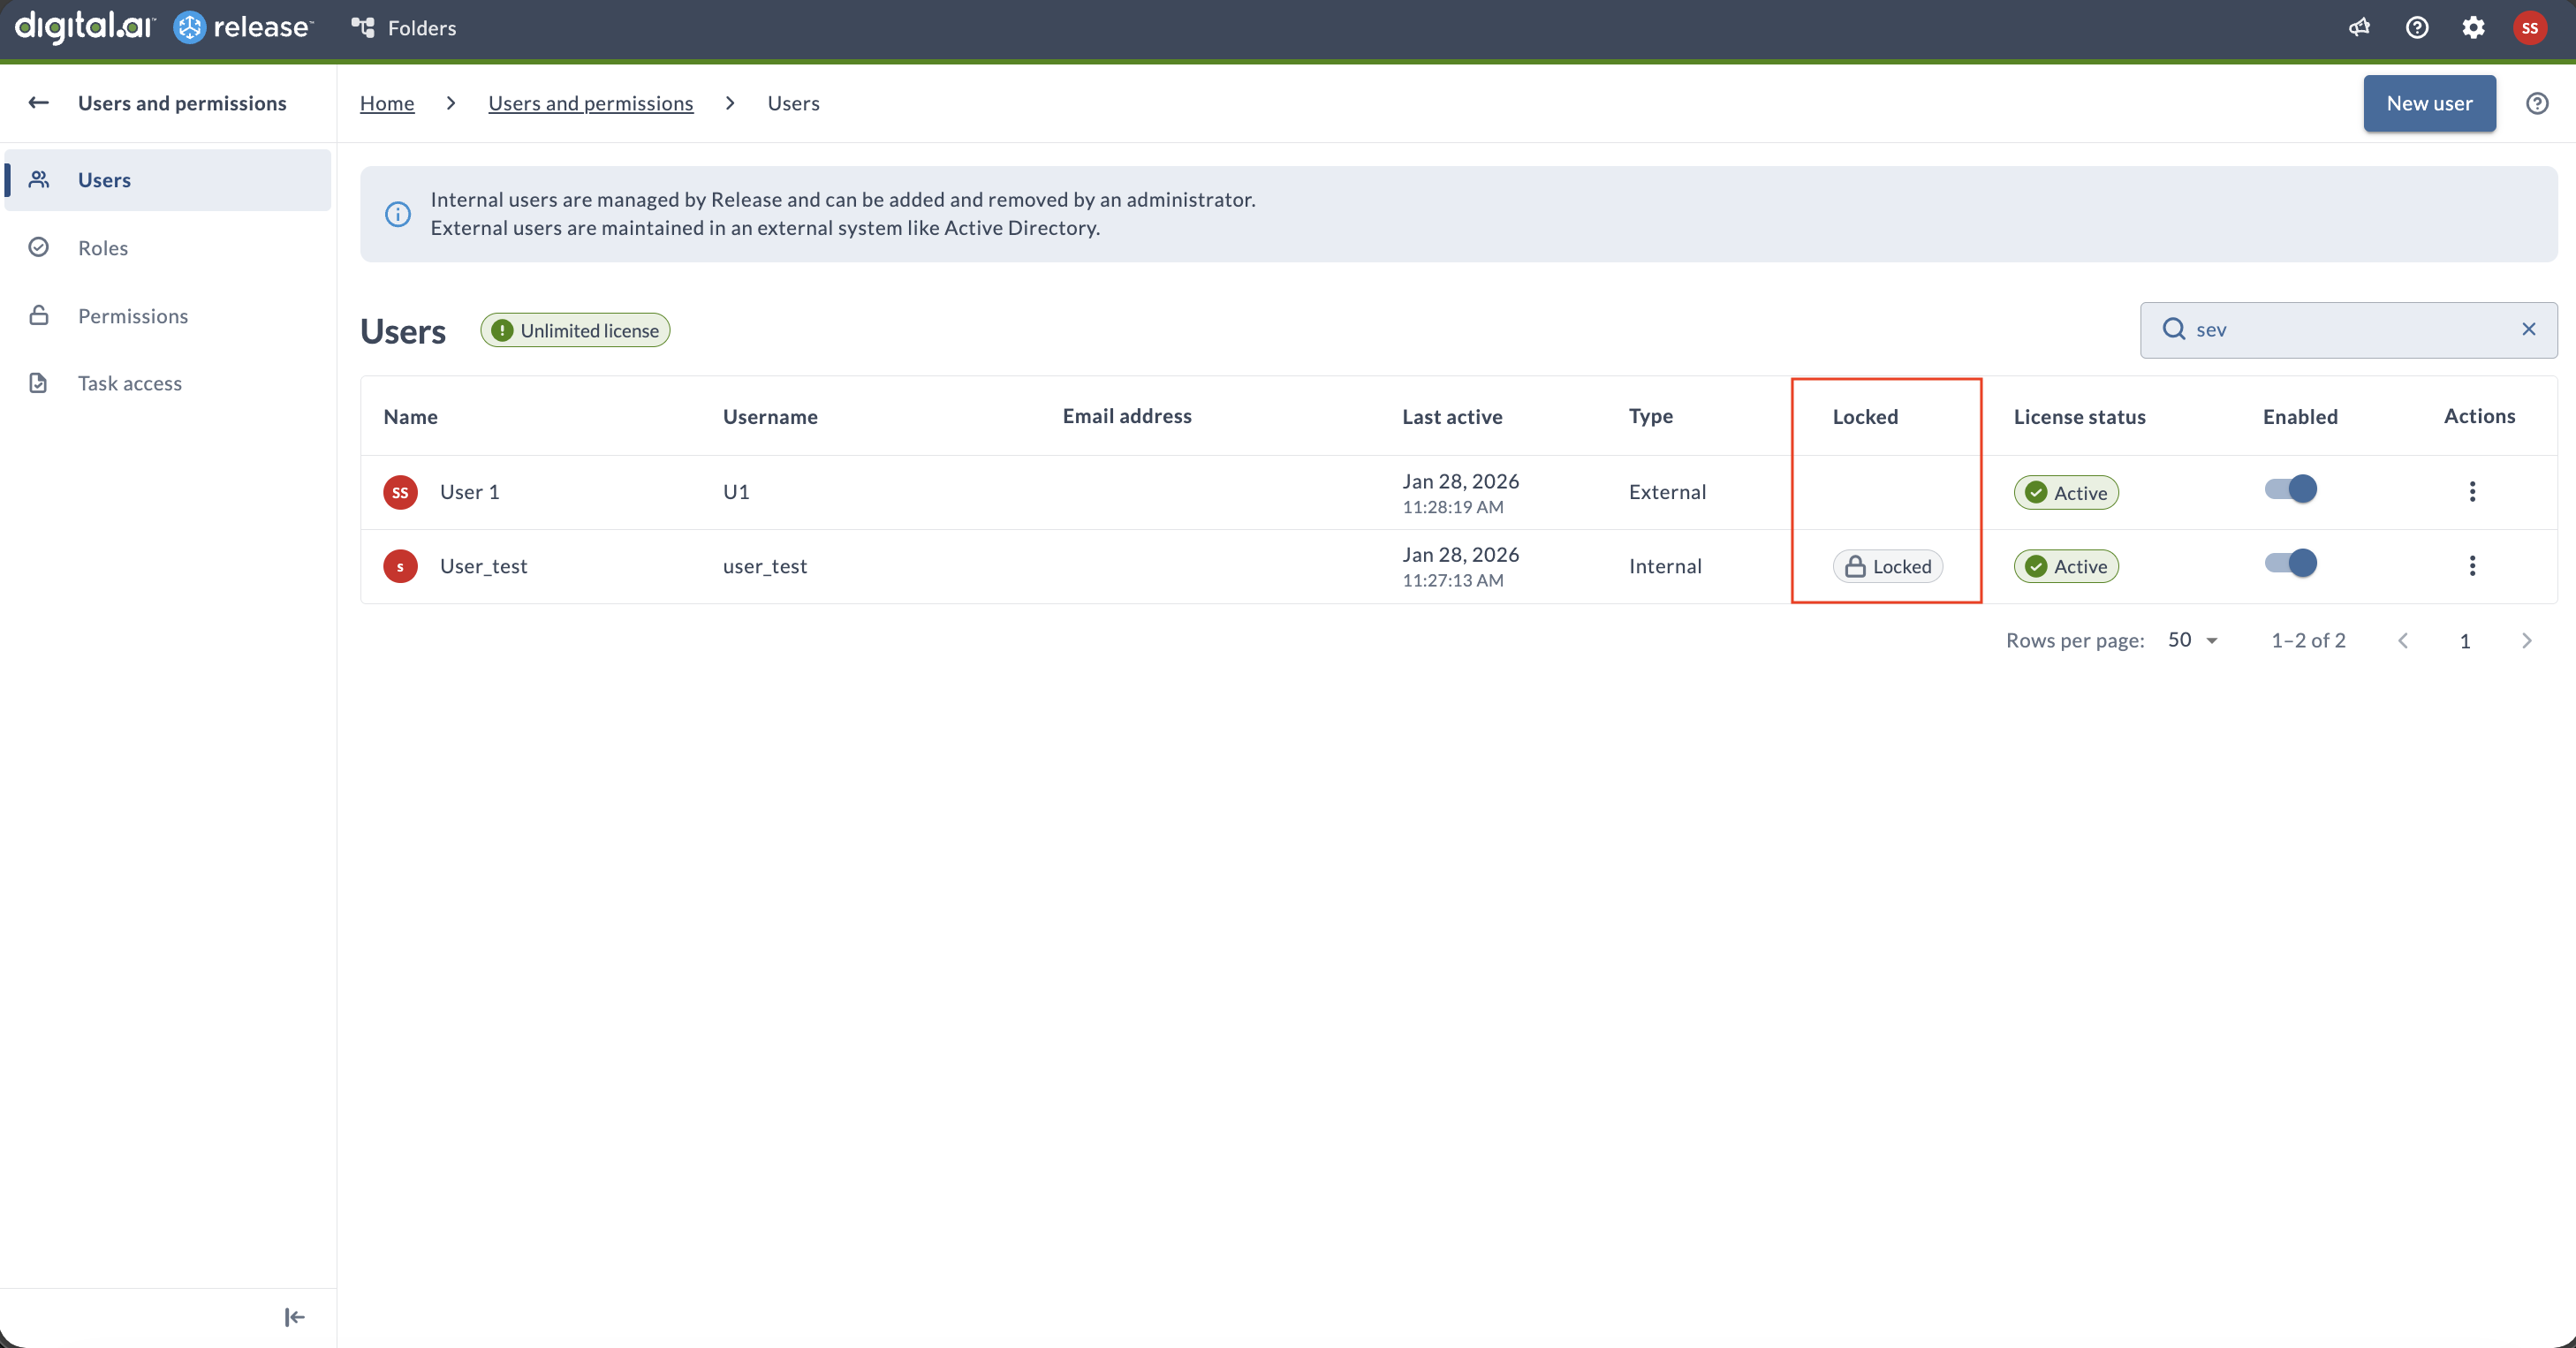
The Locked column appears on the Users management page only if Account Lockout is enabled in the configuration.
Configuration
Account Lockout is configured via the xl-release.conf file and requires a server restart to take effect.
Add the following configuration block to your xl-release.conf file:
xl {
    security {
        account-lockout {
            enabled = true
            max-login-failed-attempts = 5
            lockout-duration = "15 minutes"
            whitelist-username = ["admin"]
        }
    }
}
Configuration Parameters
| Parameter | Type | Default | Description |
|---|---|---|---|
enabled | Boolean | false | Enables or disables account lockout. When false, failed login attempts are not tracked and accounts are never locked. |
max-login-failed-attempts | Integer | 5 | Number of consecutive failed login attempts allowed before the user account is locked. The counter resets after a successful login. |
lockout-duration | Duration | 15 minutes | Duration for which a user account remains locked after exceeding the allowed number of failed login attempts. |
whitelist-username | Array | [] | List of usernames that are excluded from account lockout and cannot be locked regardless of failed login attempts. Typically used for administrator accounts or automated service users. |
Disable Account Lockout:
xl {
    security {
        account-lockout {
            enabled = false
        }
    }
}
Whitelist Multiple Users:
xl {
    security {
        account-lockout {
            enabled = true
            max-login-failed-attempts = 5
            lockout-duration = "15 minutes"
            whitelist-username = ["admin", "service-account", "backup-user"]
        }
    }
}
- Configuration changes require a server restart to take effect
- The Account Lockout settings are not available in the System Settings UI
- This is a config-file-only feature
Login Failure When Locked
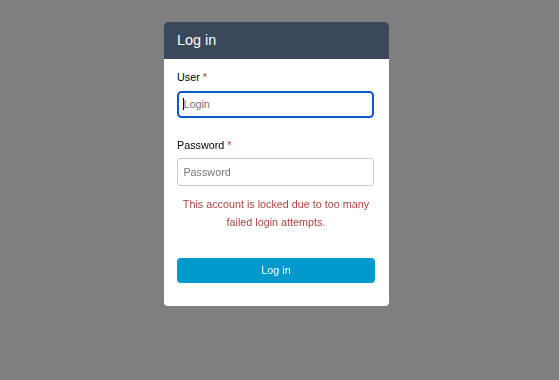
When a user exceeds the maximum failed login attempts, they will see an error message indicating their account has been locked.
Manage Locked Users
Navigate to Settings > Users and permissions to view user account status. The Users management page helps administrators quickly identify locked accounts:
- Locked column – Shows whether an account is locked (visible only when Account Lockout is enabled).
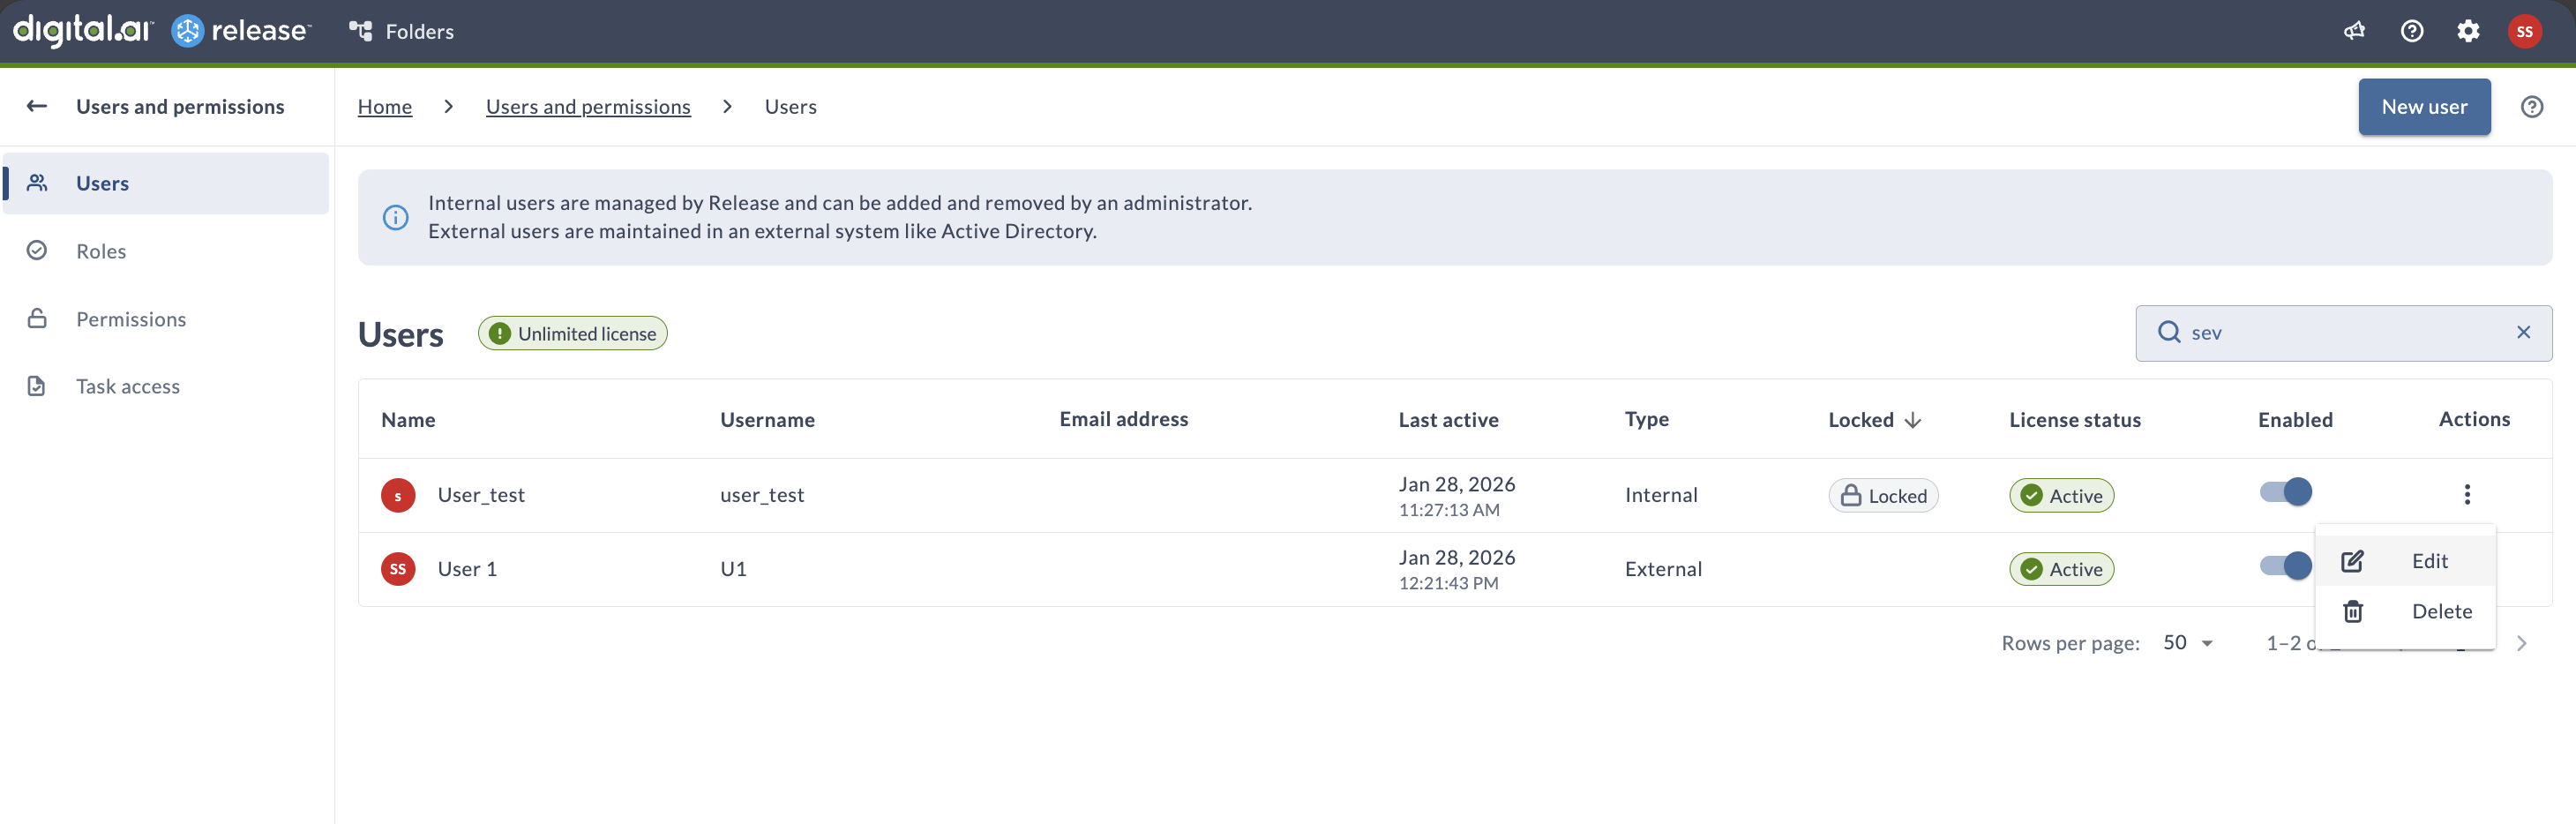
- Sorting by Locked column – Places locked accounts at the top of the list.
For more information about the Users page, see User settings.
Unlock a User Account
Administrators can manually unlock user accounts before the configured lockout-duration expires. If no action is taken, locked accounts automatically unlock after the lockout-duration expires.
To unlock a user account:
- Navigate to Settings > Users and permissions
- In the Actions column for the locked user, click on More Options and select Edit
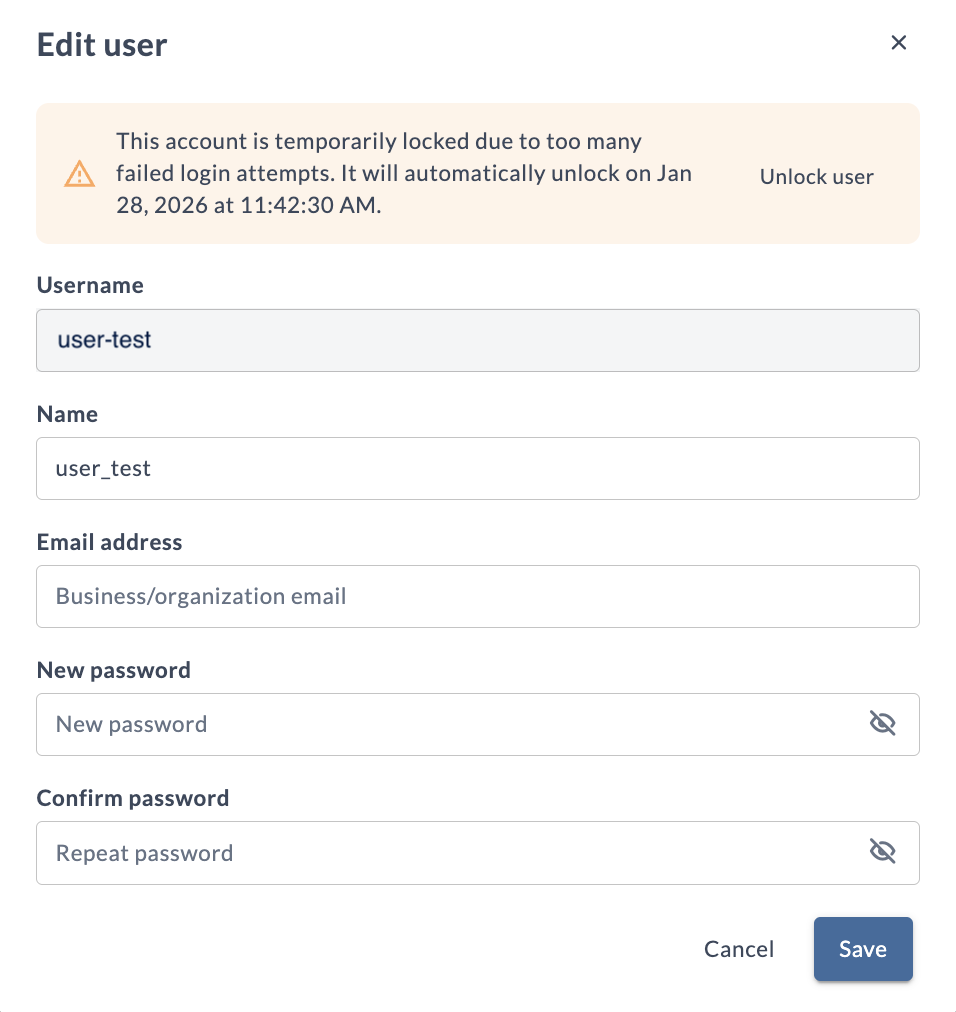
- A banner will display indicating the account is locked with an Unlock user button
- Click Unlock user to immediately restore access
Troubleshooting
Account Locked Unexpectedly
If a user account is locked unexpectedly:
- Verify the user is using correct credentials
- Review if thresholds are too strict
- Manually unlock the account via Settings > Users and permissions > Edit User
- Or wait for
lockout-durationto expire for automatic unlock
Configuration Not Taking Effect
If configuration changes don't work:
- Verify configuration syntax in
xl-release.conf - Restart the Release server (required)
- Check server logs for configuration errors
- Verify file permissions