Tour the Platform Console
The first time you sign in to the Digital.ai Platform as an administrator, you land on the Overview page. This topic explains what you see there, how the navigation is organized, and where each administrative task lives, so you can find your way around before you start configuring anything.
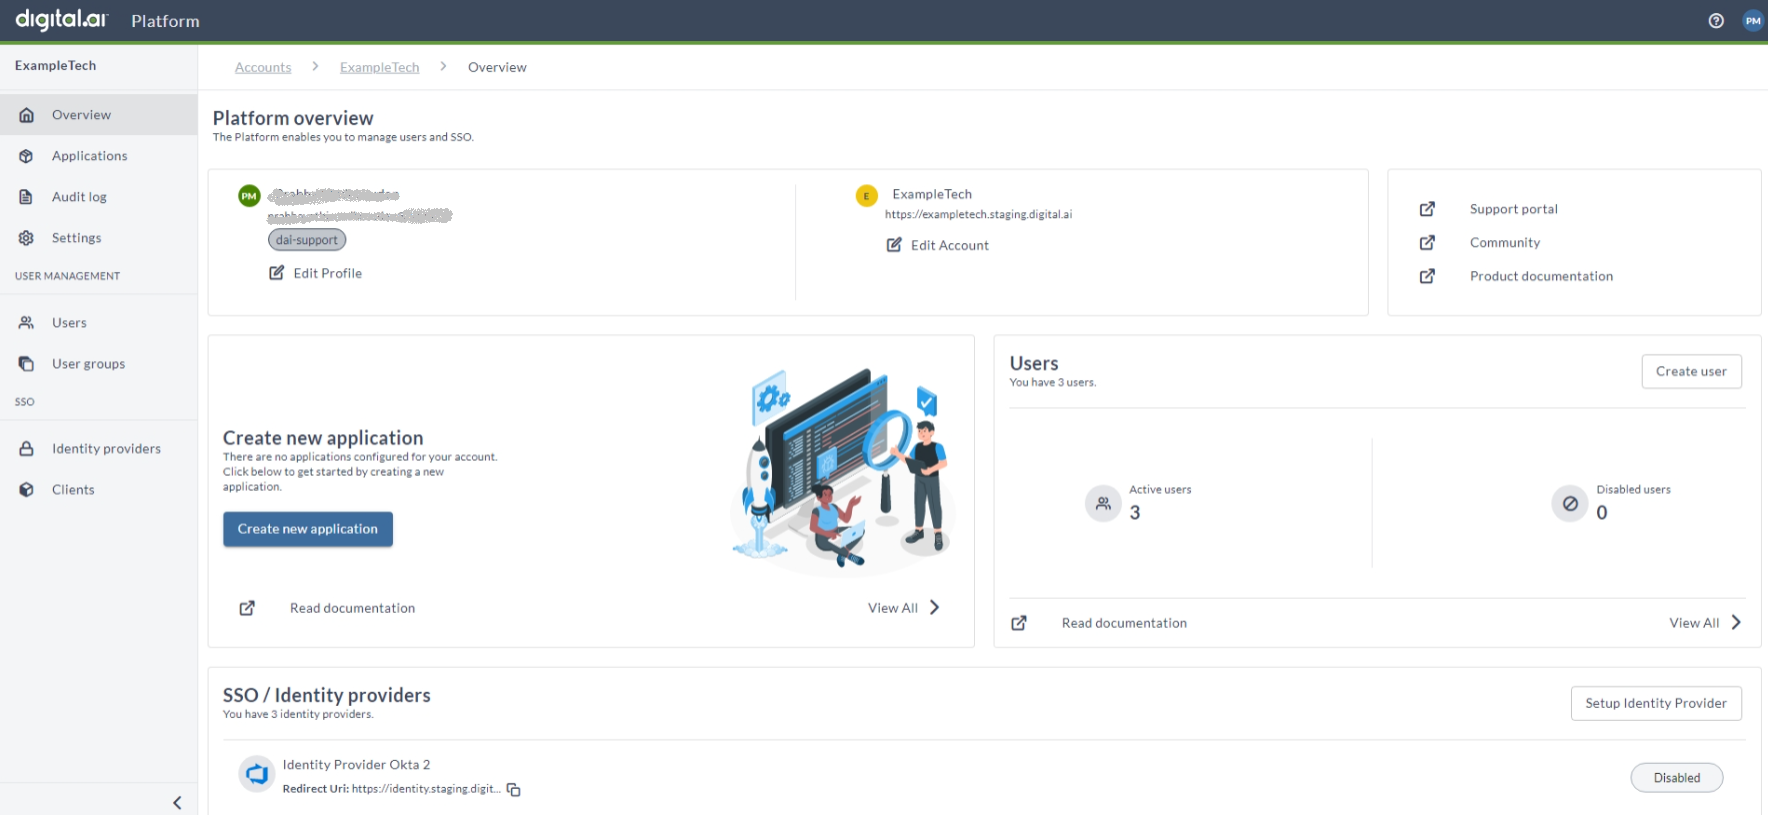
Read the Overview Page
The Overview page is a dashboard of your account's current state, with a shortcut into each area you're likely to need first.
- Your profile: your name, email address, and the roles assigned to you. Select Edit Profile to change your own details.
- Your account: the account name and the vanity domain your users navigate to. Select Edit Account to change either one. For more information, see Vanity Subdomains.
- Quick links: the Digital.ai support portal, community, and product documentation. These open outside the Platform.
- Users: how many users are active and how many are disabled, with a shortcut to create a user and a link to the full list. For more information, see Users.
- Applications: the Digital.ai products connected to your account. Until you add one, this card prompts you to create your first application. For more information, see Manage Applications.
- SSO / Identity providers: the identity providers connected to your account, each showing its redirect URI and whether it's enabled. Until you add one, this card prompts you to set up your first identity provider. For more information, see Manage Identity Providers.
Find Your Way Around the Navigation
The left navigation holds four top-level pages and two grouped sections.
| Navigation item | What you do there |
|---|---|
| Overview | Return to the dashboard described above. |
| Applications | Register Digital.ai products so your users can reach them through this account. See Manage Applications. |
| Audit log | Review who changed what, and when. See Monitor Activity with the Audit Log. |
| Settings | Configure account-wide settings. See Open the Settings Area. |
| User Management > Users | Create and manage individual users. See Users. |
| User Management > User groups | Group users so you can assign roles and permissions in bulk. See User Groups. |
| SSO > Identity providers | Connect your corporate identity provider. See Manage Identity Providers. |
The bar across the top of every page stays available no matter where you are. It holds the product switcher label, product update announcements, a help menu with links to support and documentation, and your profile menu. Your access tokens live in that profile menu; for more information, see Access Tokens.
Open the Settings Area
Settings behaves differently from the rest of the navigation, and it's worth knowing before you go looking for it.
Settings isn't a set of tabs on the Overview page. When you select Settings, the entire left navigation is replaced by the six Settings pages, and a Back to overview link appears at the top. Use that link to return to the main navigation.
The Settings area holds six pages:
| Settings page | What you configure |
|---|---|
| Account | The account name and vanity domain, downloads of your OIDC and SAML configuration files, and the product analytics and guidance option. See Account Settings. |
| Access and visibility | Which user groups can raise support tickets, the IP address allow list, and which application instances each user group sees. See Account Settings and Manage IP Address Allow List. |
| Session management | How long a session and an access token stay valid. See Account Settings. |
| User management | Self-registration and its approved email domains, plus the default user groups new users receive. See User Self-Registration. |
| User profile | The username validation rules for your account. |
| AI providers | Your own AI vendor connections and the model aliases that map to them. See Bring Your Own LLM. |
Next Steps
With the console mapped, work through the setup sequence in Getting Started.