Manage Identity Providers
As an administrator, you can provide a seamless authentication and login experience for your users by connecting your corporate SSO identity provider with the Digital.ai Platform.
The Digital.ai Platform uses your existing SSO infrastructure to securely authenticate users in Digital.ai applications and portals using the same corporate credentials they already use. Acting as a bridge between your identity provider (such as Okta or Azure AD) and your Digital.ai applications, the Digital.ai Platform grants access to those applications based on user data that already exists in your identity provider, eliminating the need for unique credentials in each application. This single point of entry also allows users to log in to the Digital.ai documentation, support, and community portals for a more personalized experience there as well.
It is possible to connect to multiple identity providers. However, Digital.ai recommends setting one identity provider as default to skip the Digital.ai login screen entirely and send users directly to your trusted identity provider login. For more information, see Set a Default IDP.
Choose Your Authentication Protocol
In general, the Digital.ai Platform can integrate with identity providers that support the OIDC and SAML 2.0 protocols. The process for integrating each with Digital.ai Identity is fairly similar, but there are unique requirements depending on which protocol your company uses.
Click one of the following buttons to read the procedure for each protocol:


The Platform doesn't enforce multi-factor authentication (MFA) itself. Your identity provider applies MFA as part of authenticating the user, so configure it there.
Understand the User Experience
When SSO is configured for your organization, an additional button appears on the Digital.ai Platform login page. When users click this button they are automatically passed over to your IdP for authentication.
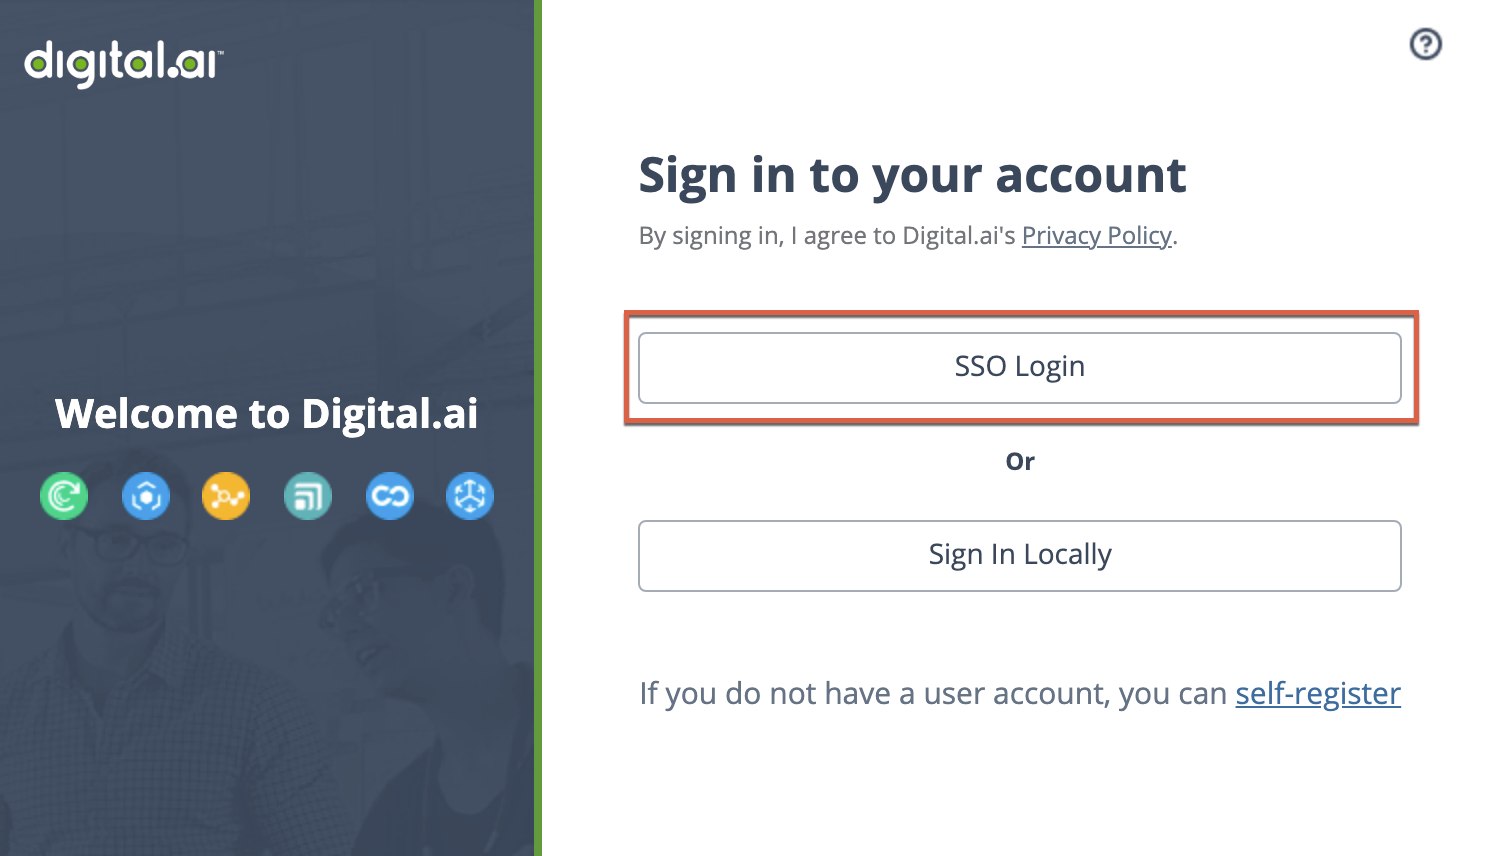
You can specify the text on this button when you configure the SSO integration.
Additionally, once your Digital.ai applications are connected to the Platform, this Platform login page will appear for your users whenever they navigate directly to an application URL (from a bookmark or existing link). For more information about connecting applications, see Applications.
Once you have connected your identity provider to the Digital.ai Platform, we recommend that you no longer manage users in the individual Digital.ai products. Doing so may cause you to experience duplicate users, mismatched user info, or other inconsistencies.
Key Concepts
Here are some basic concepts related to SSO that will help you better understand how everything works together:
- Identity provider (IdP): A single sign-on service that owns and maintains a directory of user credentials and an authentication mechanism. For example, Azure AD or Okta.
- Service provider: A web server that hosts a resource and provides access based on authentication information supplied by an identity provider. In this case, the Digital.ai applications such as Intelligence or Continuous Testing are considered service providers.
- SAML: Security Assertion Markup Language (SAML) is an XML-based open standard for exchanging authentication data across different systems. For more information on the SAML standard, see SAML 2.0.
- OIDC: OpenID Connect (OIDC) is a JSON-based open protocol that extends OAuth 2.0 to add authentication data and allow for multiple connections to one IdP. For more information on the OIDC protocol, see OpenID Connect.
Complete the SSO Setup Sequence
A complete SSO setup runs in this order. Each step links to the topic that covers it.
- Gather your identity provider details. The exact list depends on your protocol. See the prerequisites in Connect to OIDC Provider or Connect to SAML Provider.
- Connect your identity provider. Run the configuration wizard for your protocol. See Connect to OIDC Provider or Connect to SAML Provider. For a worked example against a specific provider, see Connect to Entra ID for SSO.
- Map user attributes. Mappers translate your provider's claims or assertions into the fields the Platform expects. They're required for SAML and optional for OIDC. See Map User Attributes.
- Add a signing certificate. Optional, and needed only when you validate the signature on responses from your provider. See SSO Certificates.
- Set the identity provider as default. See Set a Default IdP.
- Test the connection. See Test the SSO Connection.
Set the identity provider as default only after you've tested the connection. Until then, keep the Platform login screen available so you can still sign in with local credentials if something needs fixing.
If you're connecting SSO as part of integrating a specific Digital.ai product, follow Prepare the Platform for a Product Integration instead. It sequences these same steps alongside the product-side work.