How to Integrate Agility with the Platform
This guide provides step-by-step instructions for integrating Digital.ai Agility with the Digital.ai Platform.
The Platform uses your existing single sign-on (SSO) infrastructure to securely authenticate users in Agility using the same corporate credentials they already use. Acting as a bridge between your identity provider (IdP) and Agility, the Platform grants access to Agility based on user data from your IdP, eliminating the need for unique credentials in Agility.
This guide assumes that you have already installed Agility and configured one or more roles. If you have not yet done so, see the Agility documentation
The following diagram summarizes the workflow required to complete this integration:
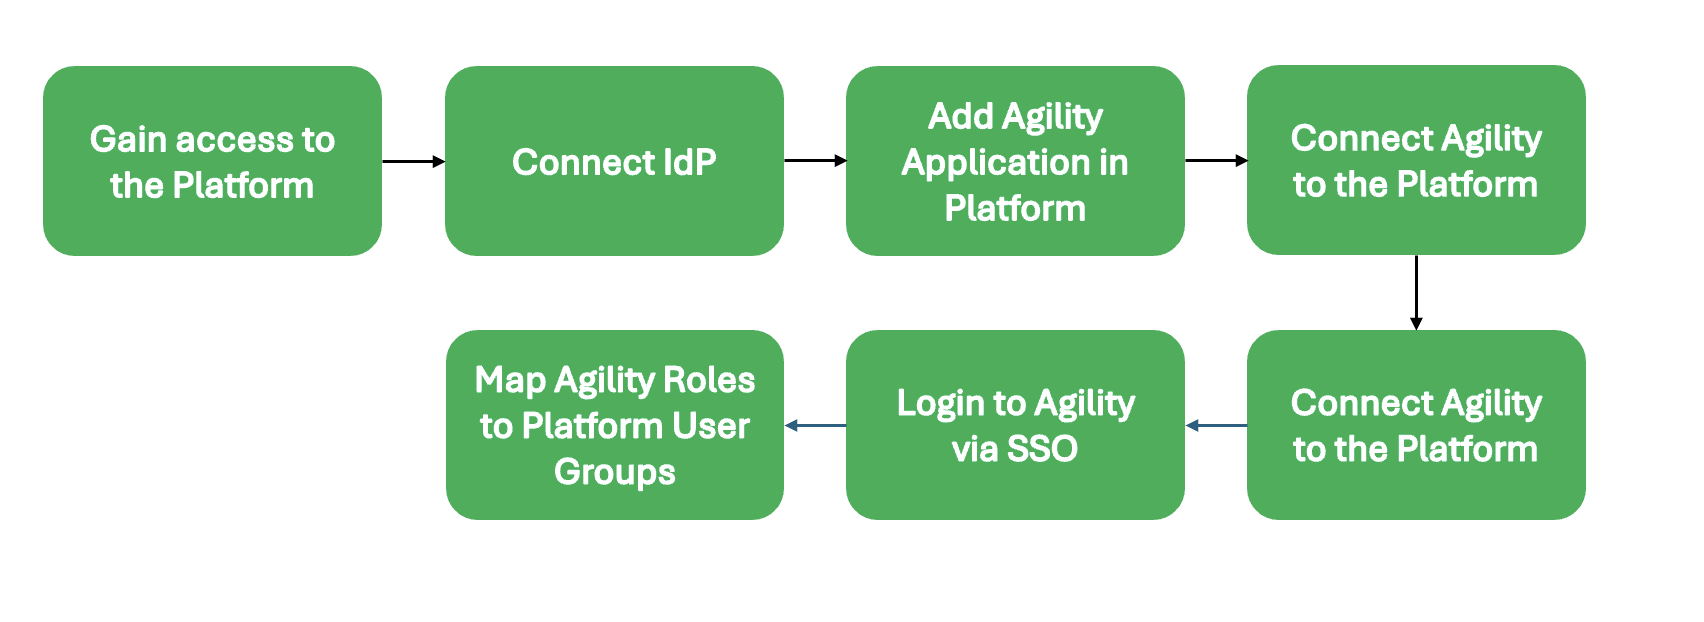
If you have any questions or run into any issues following this guide, please reach out to Customer Support.
Before You Start
Complete the setup described in Prepare the Platform for a Product Integration. That topic covers administrator access, connecting your identity provider, and mapping user attributes — the work that's the same for every Digital.ai product. This guide picks up from there: it registers Agility as an application in the Platform, then covers the Agility-side configuration.
Skip the group mapping step in that topic. Agility doesn't determine permissions from Platform user groups. Instead, it matches each user to an existing Agility member account by username, as described in Create Corresponding Users within Agility.
Step 1: Connect Agility to the Platform
In this step, you'll learn how to establish a connection between the Platform and your Agility instance for user management and login purposes. This step does not cover setting up the Cloud Connector or Data Collector.
Add Agility as an Application
First, you need to define your Agility instance as an application in the Platform. This gives you the application details that you add to your Agility configuration so Agility understands the configurations you've made in the Platform.
The steps below are the Agility version of the registration wizard. For what each wizard page does, the full list of application types, how mappers work, and how to get the client ID and secret again later, see Manage Applications.
- In the left navigation, click Applications.
- Alternatively, you can click Create application on the Platform Overview page.
- Click Applications.
- On the Select application page:
- In Select application, choose Agility.
- In Instance name, enter the application's custom name. For example,
Agility_demo. - In URL, enter the application's URL.
- In Description, enter the application's description.
- Click Next.
- The Advanced configuration page is optional. Depending on the selection you made in the previous step, the majority of fields may be automatically filled in. Click Next.
- The Mappers page is optional, because mappers are automatically created as part of this process. Click Next.
- On the Get client ID & secret page, review the summary of the application details and save the values you need for the next section.
- Click Complete.
Edit the Agility Configuration File
Now you need to edit the versionone.web/user.config file in your Agility instance to add entries for OIDC login. Add or edit the following entries, using the application detail values that you obtained after adding Agility as an application:
<add key="IsFederatedAuthModuleEnabled" value="true" />
<add key="AuthProvider" value="Oidc" />
<add key="Oidc:DiscoveryUri" value="DISCOVERY_URL_VALUE" />
<add key="Oidc:ClientID" value="OIDC_CLIENT_ID" />
<add key="Oidc:Secret" value="OIDC_SECRET" />
<add key="Oidc:Audience" value="OIDC_AUDIENCE" />
<add key="WebRoot" value="ROOT_OF_WEB_APPLICATION" />
To allow logout, also add or update the following user.config entries:
<add key="DelegatedLogoutAllowed" value="true" />
<add key="LogoutRedirectUrl" value="ROOT_OF_WEB_APPLICATION/APPLICATION_INSTANCE/OidcAuth.mvc/LogOut" />
<add key="FederatedLogoutRedirectUrl" value="DESTINATION_URL" />
- Set
DelegatedLogoutAllowedto true. - Set
LogoutRedirectUrlto reflect your environment instance. - Set
FederatedLogoutRedirectUrlto the final URL destination after logout completes.
Create Corresponding Users within Agility
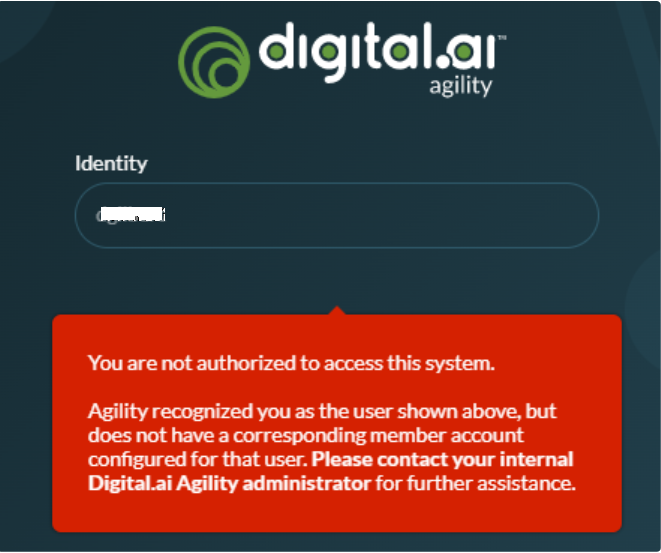
Each user who signs in through the Platform needs a matching member account in Agility, with a username that aligns with the one the Platform provides. This is how Agility resolves permissions for the user.
If a user has no corresponding member account in Agility, the following warning appears.
Next Steps
At this point you have successfully connected Agility with the Platform. From here, you can move on to any of the following tasks (and more that aren't listed here):
- Inform your users that they can begin accessing Agility with their corporate SSO credentials.
- You may also want to instruct them to stop using their old application-specific login credentials entirely to avoid any confusion caused by using multiple user accounts.
- Begin configuring Analytics dashboards. For more information, see Creating Dashboards.